AGAMA
If you have seen any of our guides to adding a vehicle logo to the center of your android headunit screen then you may have used the AGAMA car launcher for this task.
Agama is a highly customizable and proficient Android headunit launcher, but it is not the only one available. Look at our list of Android headunit launchers if you choose not to use Agama and want some alternatives.
One Key Trick
One fundamental trick to the Agama launcher to unlock its full potential is a small yet powerful option found in the menu system. Activate this fundamental trick built into Agama to unleash the full potential of the color customization of Agama.
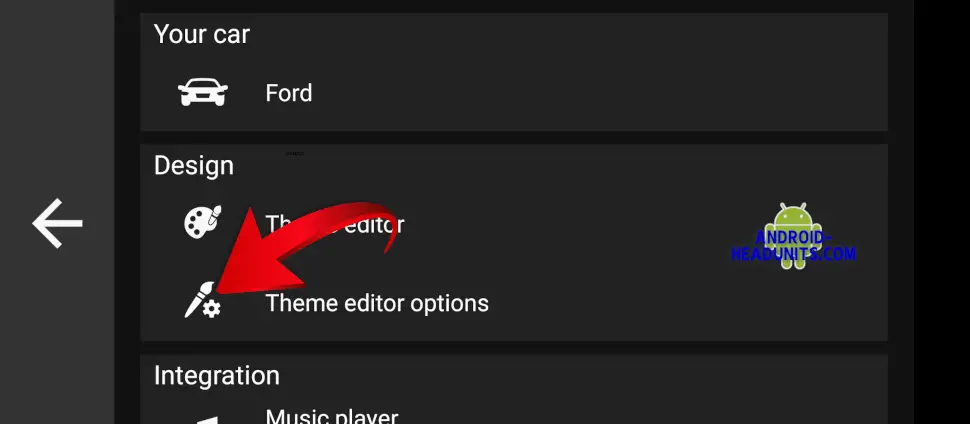
These are the steps to reach the option to allow better launcher customization.
- Tap the gear wheel in the bottom right corner of the Agama main screen.
2. Tap the ‘Theme Options’ menu item
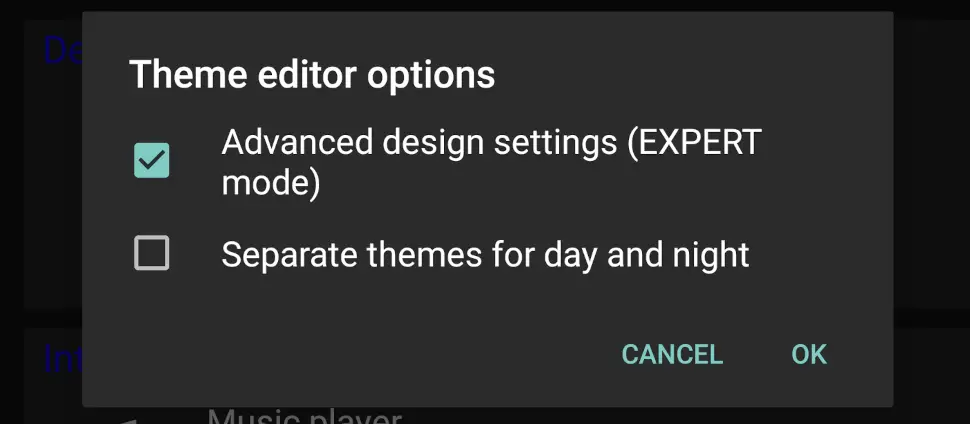
3. Select the ‘Advanced design settings’ EXPERT mode and tap OK
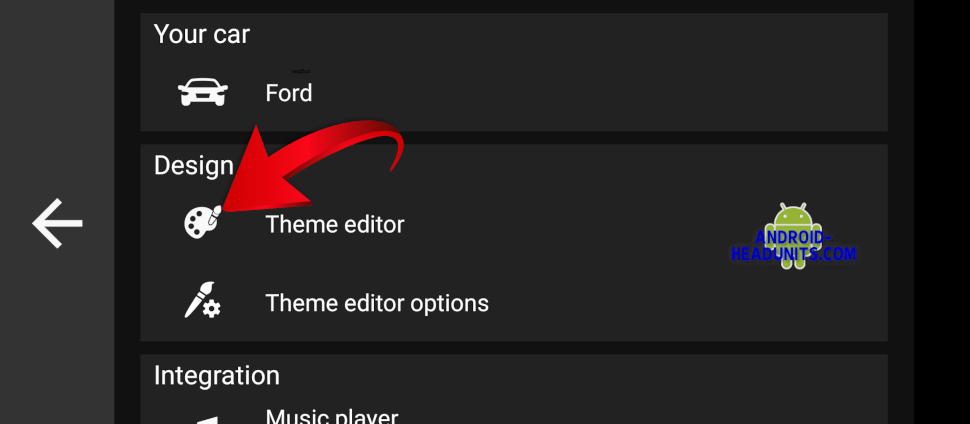
4. Now tap the ‘Theme Editor,’ and you will see a much more customizable options list for coloring much more of the screen locations.
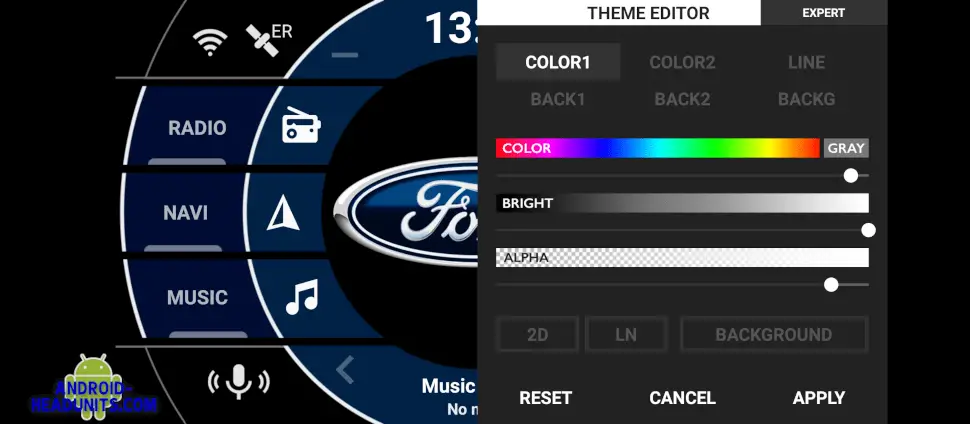
5. More options to select color ‘color,’ brightness, and alpha (transparency, opacity) to fully set the look of your launcher to match your vehicle interior.
The buttons
Now you have the colors you want to select, which app each button activates. Only Android apps can have actions for a button. Features that are not Android, like reversing/backup camera, are not Android features and won’t be available on a launcher button.
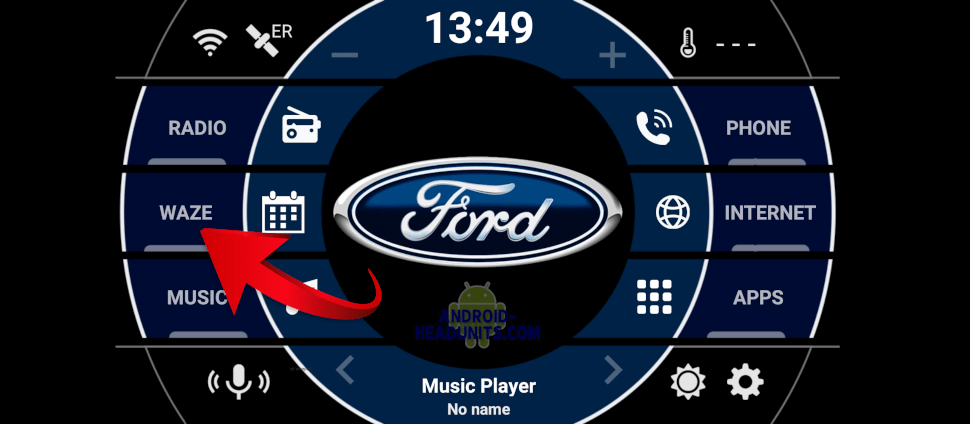
But if you have an app, like google maps or Waze navigation, and want to map to the NAVI button to say, Waze, follow these instructions. Substitute any of the names, icons, and apps to your liking.
- A long NAVI button press will bring up a menu with ICON, NAME, and APP options.
- Tap ICON to see a list of potential icons for your NAVI button,
- Tap NAME to change the button label, e.g ‘WAZE’ may be more appropriate
- Tap APP to select the app you want to be activated by this button press.
(a long press on the app is where you can set an autostart, along with a delay) - Click ‘close’ and now you can test your new button.
Do the same for as many of the buttons as you like


