
How to Create a Custom Boot Animation for an Android Headunit
A custom boot animation may be possible to install on your Android headunit. If your headunit has an existing custom animation it may be possible to change this to one of your own making.
Creating a custom boot animation for your Android head unit can significantly enhance the personalization and aesthetic appeal of your vehicle’s infotainment system. Though it might sound complex, the process is straightforward if you follow the right steps. Here’s a detailed guide on how to create and install a custom boot animation for your Android head unit.
What is an Animation?
For the process of making a Do It Yourself (D.I.Y) animation you can think of the animation as just a series of images, each slightly different from the previous. When the images are shown in sequential order, quickly enough, the image looks as if it is changing (animated). What you are seeing is a series of linked and slightly different pictures. These images are called frames.
Resolution
An animation is made up of individual images, these are pictures. One of the ways pictures are defined is by their resolution. It is best to match each frame (picture) to the resolution of the screen of your Android headunit. Each frame will have the same resolution as the others in the same Animation.
Understanding Boot Animations for an Android Headunit
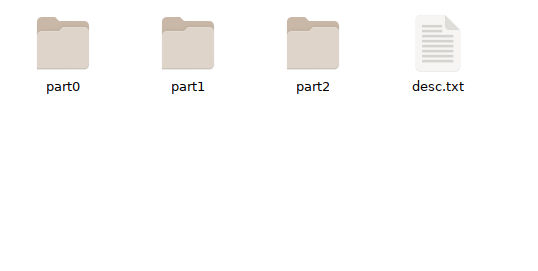
A boot animation in Android is essentially a sequence of images displayed rapidly during the device’s startup process. These images are organized frame by frame within a .zip file along with a text file (desc.txt) that dictates the animation’s behaviour.
Structure of Bootanimation.zip
The bootanimation.zip file has a specific structure:
bootanimation.zip
│
└───part0
│   │   000.png
│   │   001.png
│   │   002.png
│   │   ...
│
└───part1
│   │   000.png
│   │   001.png
│   │   002.png
│   │   ...
│
└───part2
│   │   000.png
│   │   001.png
│   │   002.png
│   │   ...
│
└───desc.txt- Images: Stored in folders (e.g., part0, part1, part2) and sequentially numbered (000, 001, 002, etc.).
- desc.txt: A text file specifying the animation details (resolution, frame rate, and loop behaviour).
Step-by-Step Guide to Creating a Custom Headunit Boot Animation
Step 1: Prepare Your Images
- Design Your Frames: Create a series of images (frames) for your animation. Tools like Adobe Photoshop, GIMP, or any other image editing software can be used.
- Format and Resolution: Save (Export As..) the images in either .JPG or .PNG format. Ensure the resolution matches that of your head unit’s screen (e.g., 1280 x 720 pixels). Check your headunit’s manual or settings for the correct resolution.
Step 2: Organize the Images
- Create Folders: Organize your images into folders (e.g., part0, part1, part2). Each folder represents a segment of the animation. You don’t need many folders, but you can achieve more complex animations with more folders.
- Sequential Numbering: Name the images sequentially starting from 000 (e.g., 000.png, 001.png, 002.png).
- desc.txt: is just a text file with a few codes in it, followed by a blank line. Use notepad or a similar plain text writer. Do not use Microsoft Word to create your desc.txt file.
Step 3: Create the desc.txt File
File Structure: The desc.txt file should have the following format:
[width] [height] [frame rate]
[p/c][loop count] [pause] [folder] [background colour (optional)]
[p/c][loop count] [pause] [folder] [backgroundg colour (optional)]
[p/c][loop count] [pause] [folder] [backgroundg colour (optional)]
Example desc.txt:
1280 720 25
p 1 10 part0 000000
p 1 10 part1 000000
p 1 10 part2 000000Resolution: Width and height of the images; (1280 720)
Frame Rate: Number of frames per second; (25).
Type: ‘p’ for playing until the end, ‘c’ for continuous until the system finishes booting; (p).
Loop Count: Number of times to loop the folder images; (1).
Pause: Number of frames to pause on the last image; (10).
Folder: The folder containing the images; (part0, part1, part2).
Background Color: Optional hexadecimal colour code for the background (000000).
Step 4: Create the bootanimation.zip File
Compression: Use a compression tool (e.g., WinRAR, 7-Zip) to zip the images and desc.txt without compression.
For WinZip and Windows, create a new zip file, choose the save location, name the file bootanimation.zip, then, on the ‘Add’ Window look for the ‘Compression’ option (just below action) and select ‘None’ from the drop-down list.
Step 5: Install the Boot Animation
- Transfer the File: Copy the bootanimation.zip file to your Android head unit. This can typically be done via USB, SD card, or direct transfer using a file manager app.
- Replace Existing Animation: Using a file manager with root access (e.g., Root Explorer), navigate to
/system/mediaor/data/localand replace the existing bootanimation.zip with your custom one. - Set Permissions: Ensure the correct file permissions are set. Typically, the file should have permissions set to
-rw-r--r--(read and write for owner, read for group and read for others) aka permissions 644. - Without Root, use ADB over wifi or USB and a laptop to backup and install the bootanimation.zip
Tips and Best Practices
- Backup: Always back up your original bootanimation.zip before replacing it.
- Testing: Test your animation on a different device or Android emulator before installing it on your head unit to ensure it works smoothly.
- Updates: Some Android updates might overwrite custom boot animations. Keep a copy of your custom animation for reinstallation if needed.
- File Names: The file name must end in sequential numbering, or just contain sequential numbering. It can be called Animation_000, Animation_001, Animation_002, or Ford_000, Ford_001, Ford_002. The important part is the name staying the same and the sequential numbering after the underscore. Having a descriptive name can help you create more than one animation and stay sane.
- ZIP Compression: ZIP without compression. The Sans Compression option will group the image and description files without applying any compression to them, into a single file called; bootanimation.zip
- Segments: The sequential animation images are stored in folders, part1, part2, part3. The advantage of Segmentation of the files is to give greater control over the timing via the desc.txt file. The loop count and pause can be used to good effect. An animation segment of ‘build-up’, pause, rotate, pause and ‘disappear’ can be controlled by the segments and pause controlled by desc.txt
More complex pause, play, pause play can be created with more segments. Don’t forget your headunit will still need to finish booting after the animation has stopped.
Conclusion
Creating a custom boot animation for your Android head unit is a fun and rewarding way to personalize your vehicle’s interface. By following these steps, you can create a smooth and visually appealing animation that enhances your car’s start-up experience. Enjoy the customization process and the unique touch it brings to your driving environment!


